

Automations
Build an inbound integration flow from a template or from scratch: settings and retries, HTTP steps and variables, then map the result.
Automations is the lower half of Integrations, under Connections in the sidebar. An automation is a flow of HTTP calls that Callab runs for you. Inbound flows pull data in, typically contacts from a CRM; outbound flows push data out and are covered on Webhooks. This page is about the inbound kind.
Add Flow
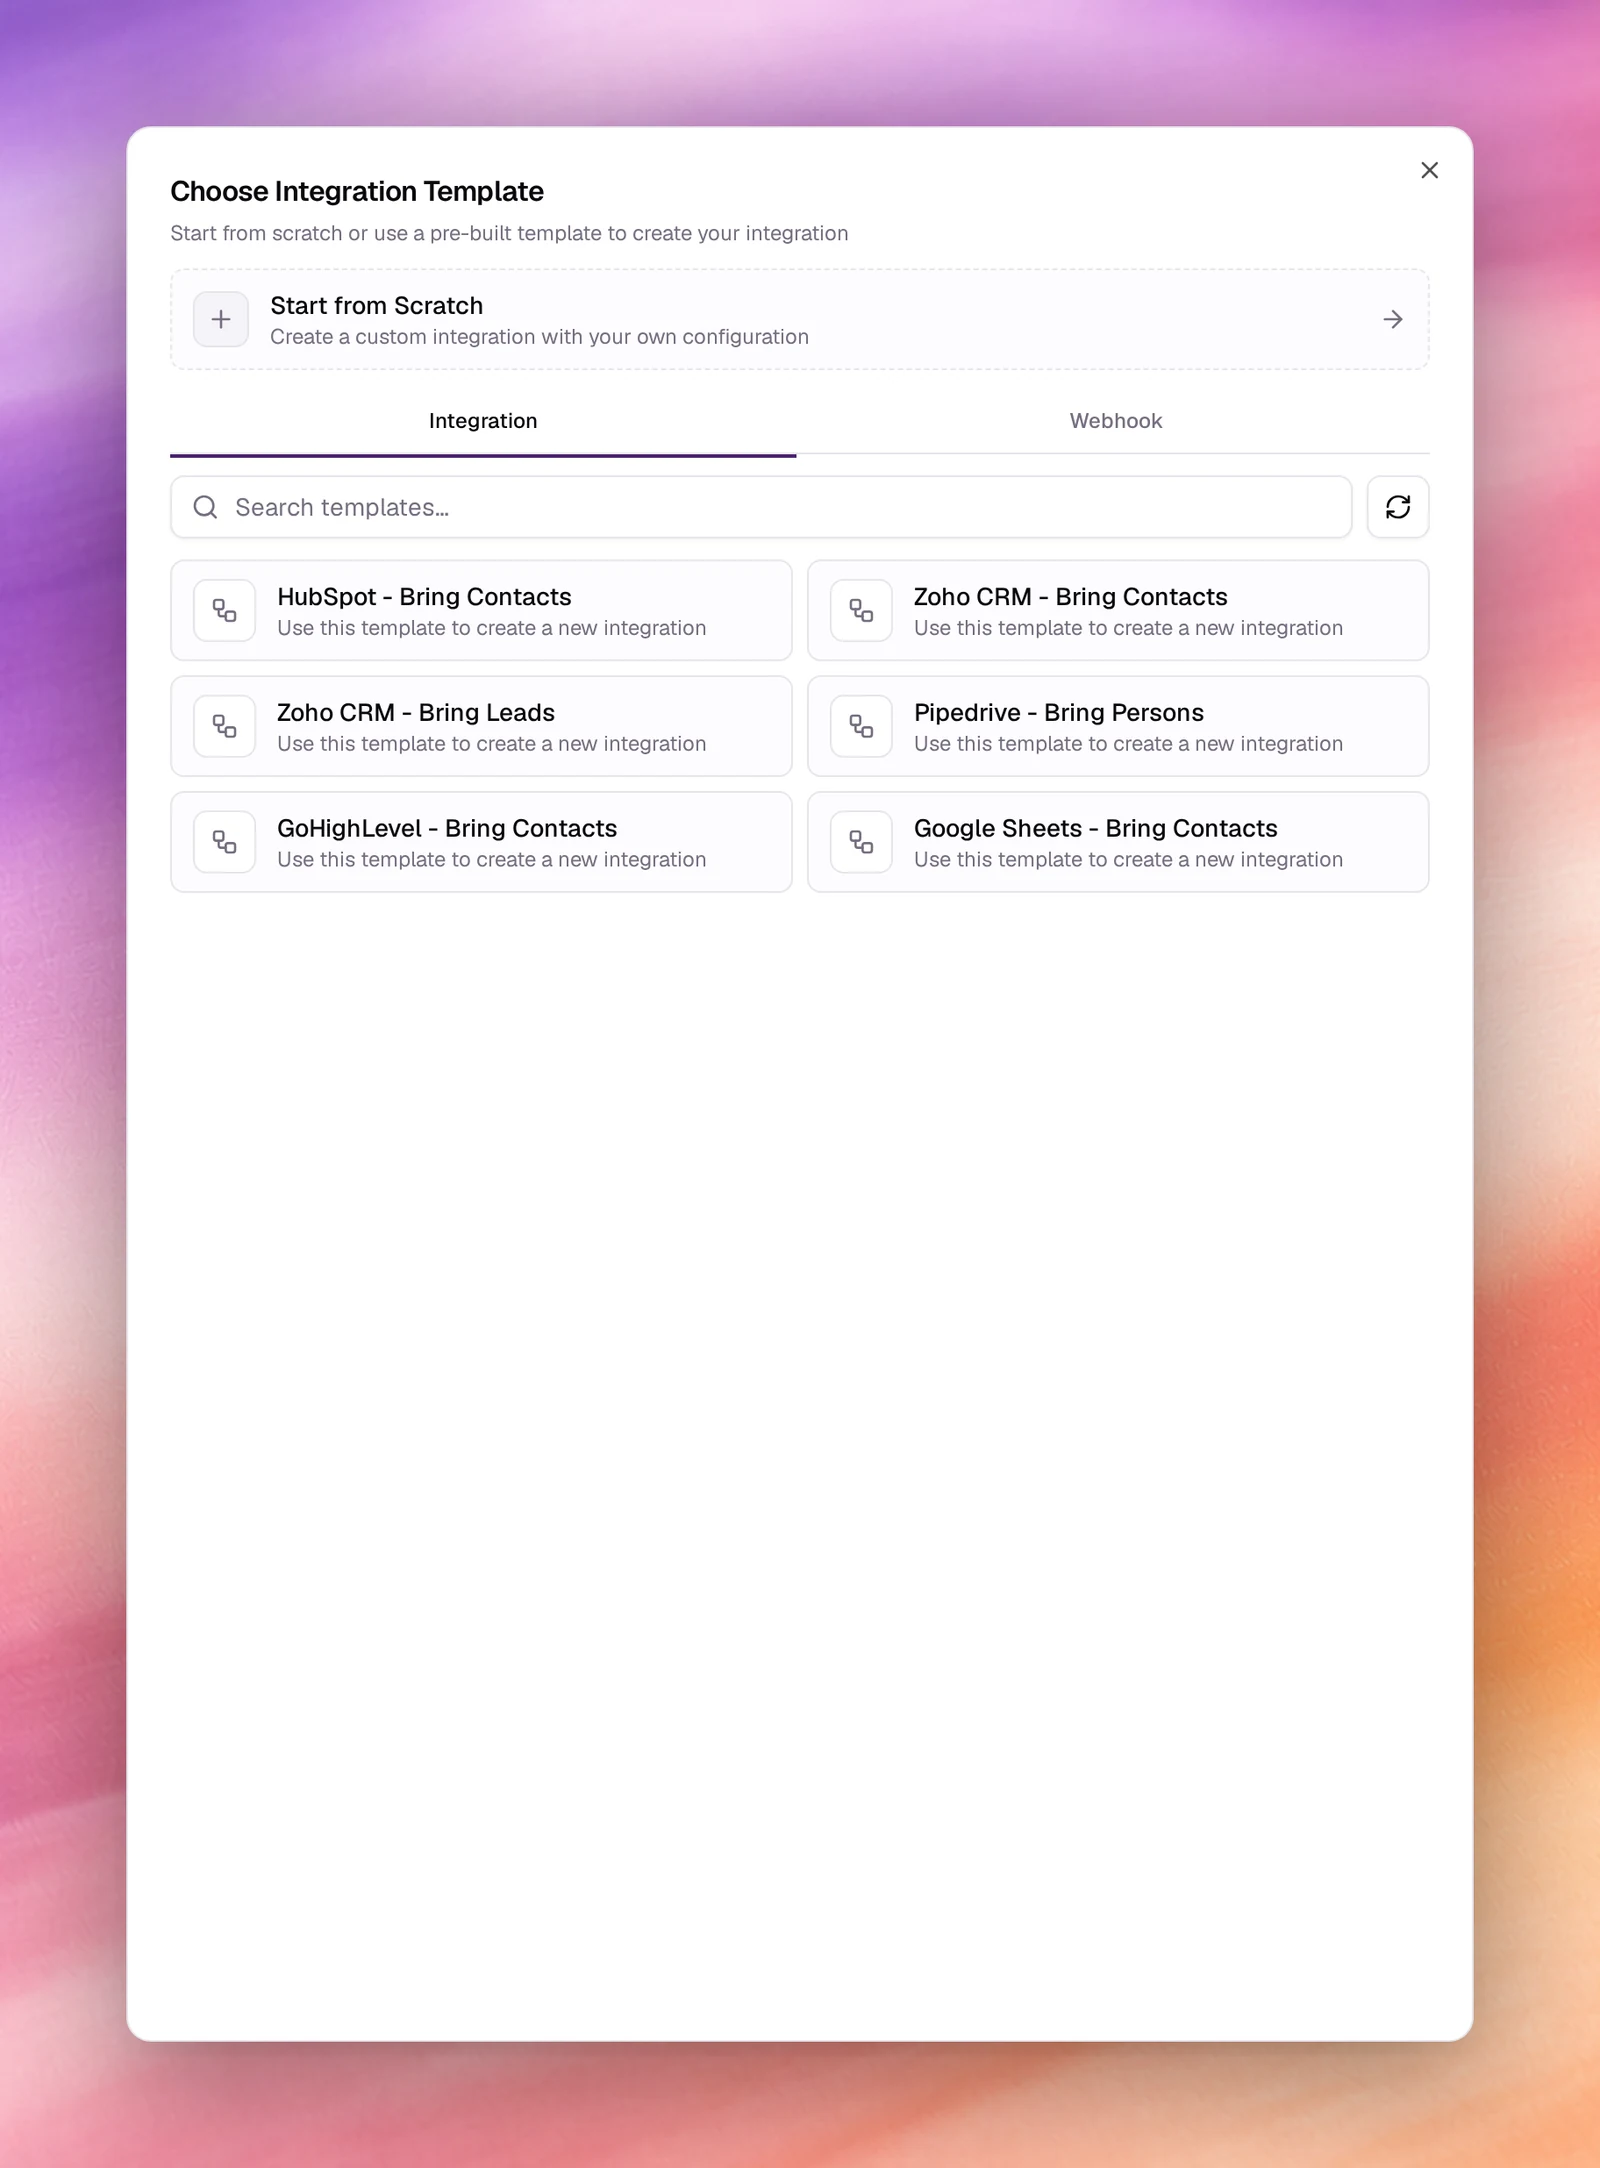
Add Flow opens Choose Integration Template. At the top, Start from Scratch creates a custom integration with your own configuration. Below it, two tabs: Integration lists inbound templates, Webhook lists outbound ones. A search box filters by name, and the list shows 10 templates a page with Previous and Next.
The inbound templates are HubSpot - Bring Contacts, Zoho CRM - Bring Contacts, Zoho CRM - Bring Leads, Pipedrive - Bring Persons, GoHighLevel - Bring Contacts and Google Sheets - Bring Contacts.
From a template
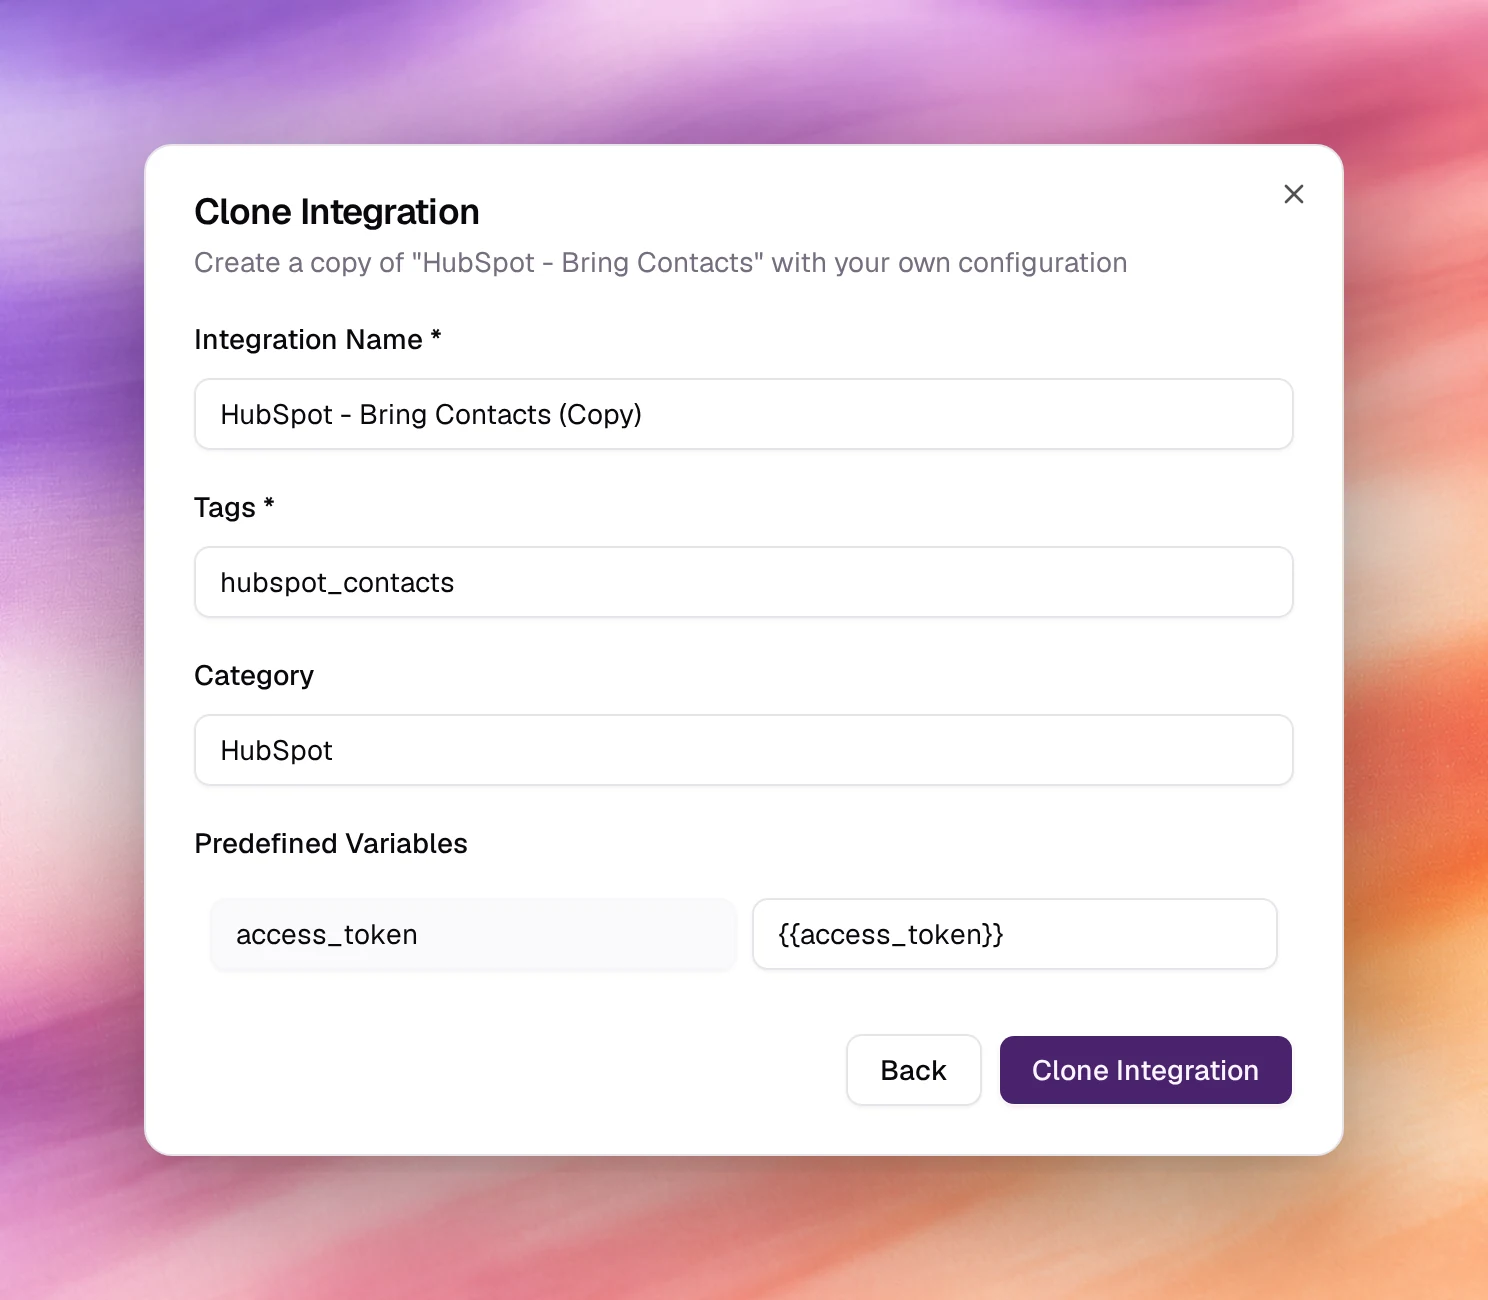
Choosing a template turns the same dialog into Clone Integration; Back
returns to the list. It is pre-filled: Integration Name (the template’s name plus
(Copy)), Tags (required, for example hubspot_contacts),
Category (the system’s name) and one predefined variable, access_token, whose
value is {{access_token}}. Rename it if you like, replace the variable’s value with
your token if the system is not connected, then Clone Integration. The flow
appears in the Automations list.
From scratch
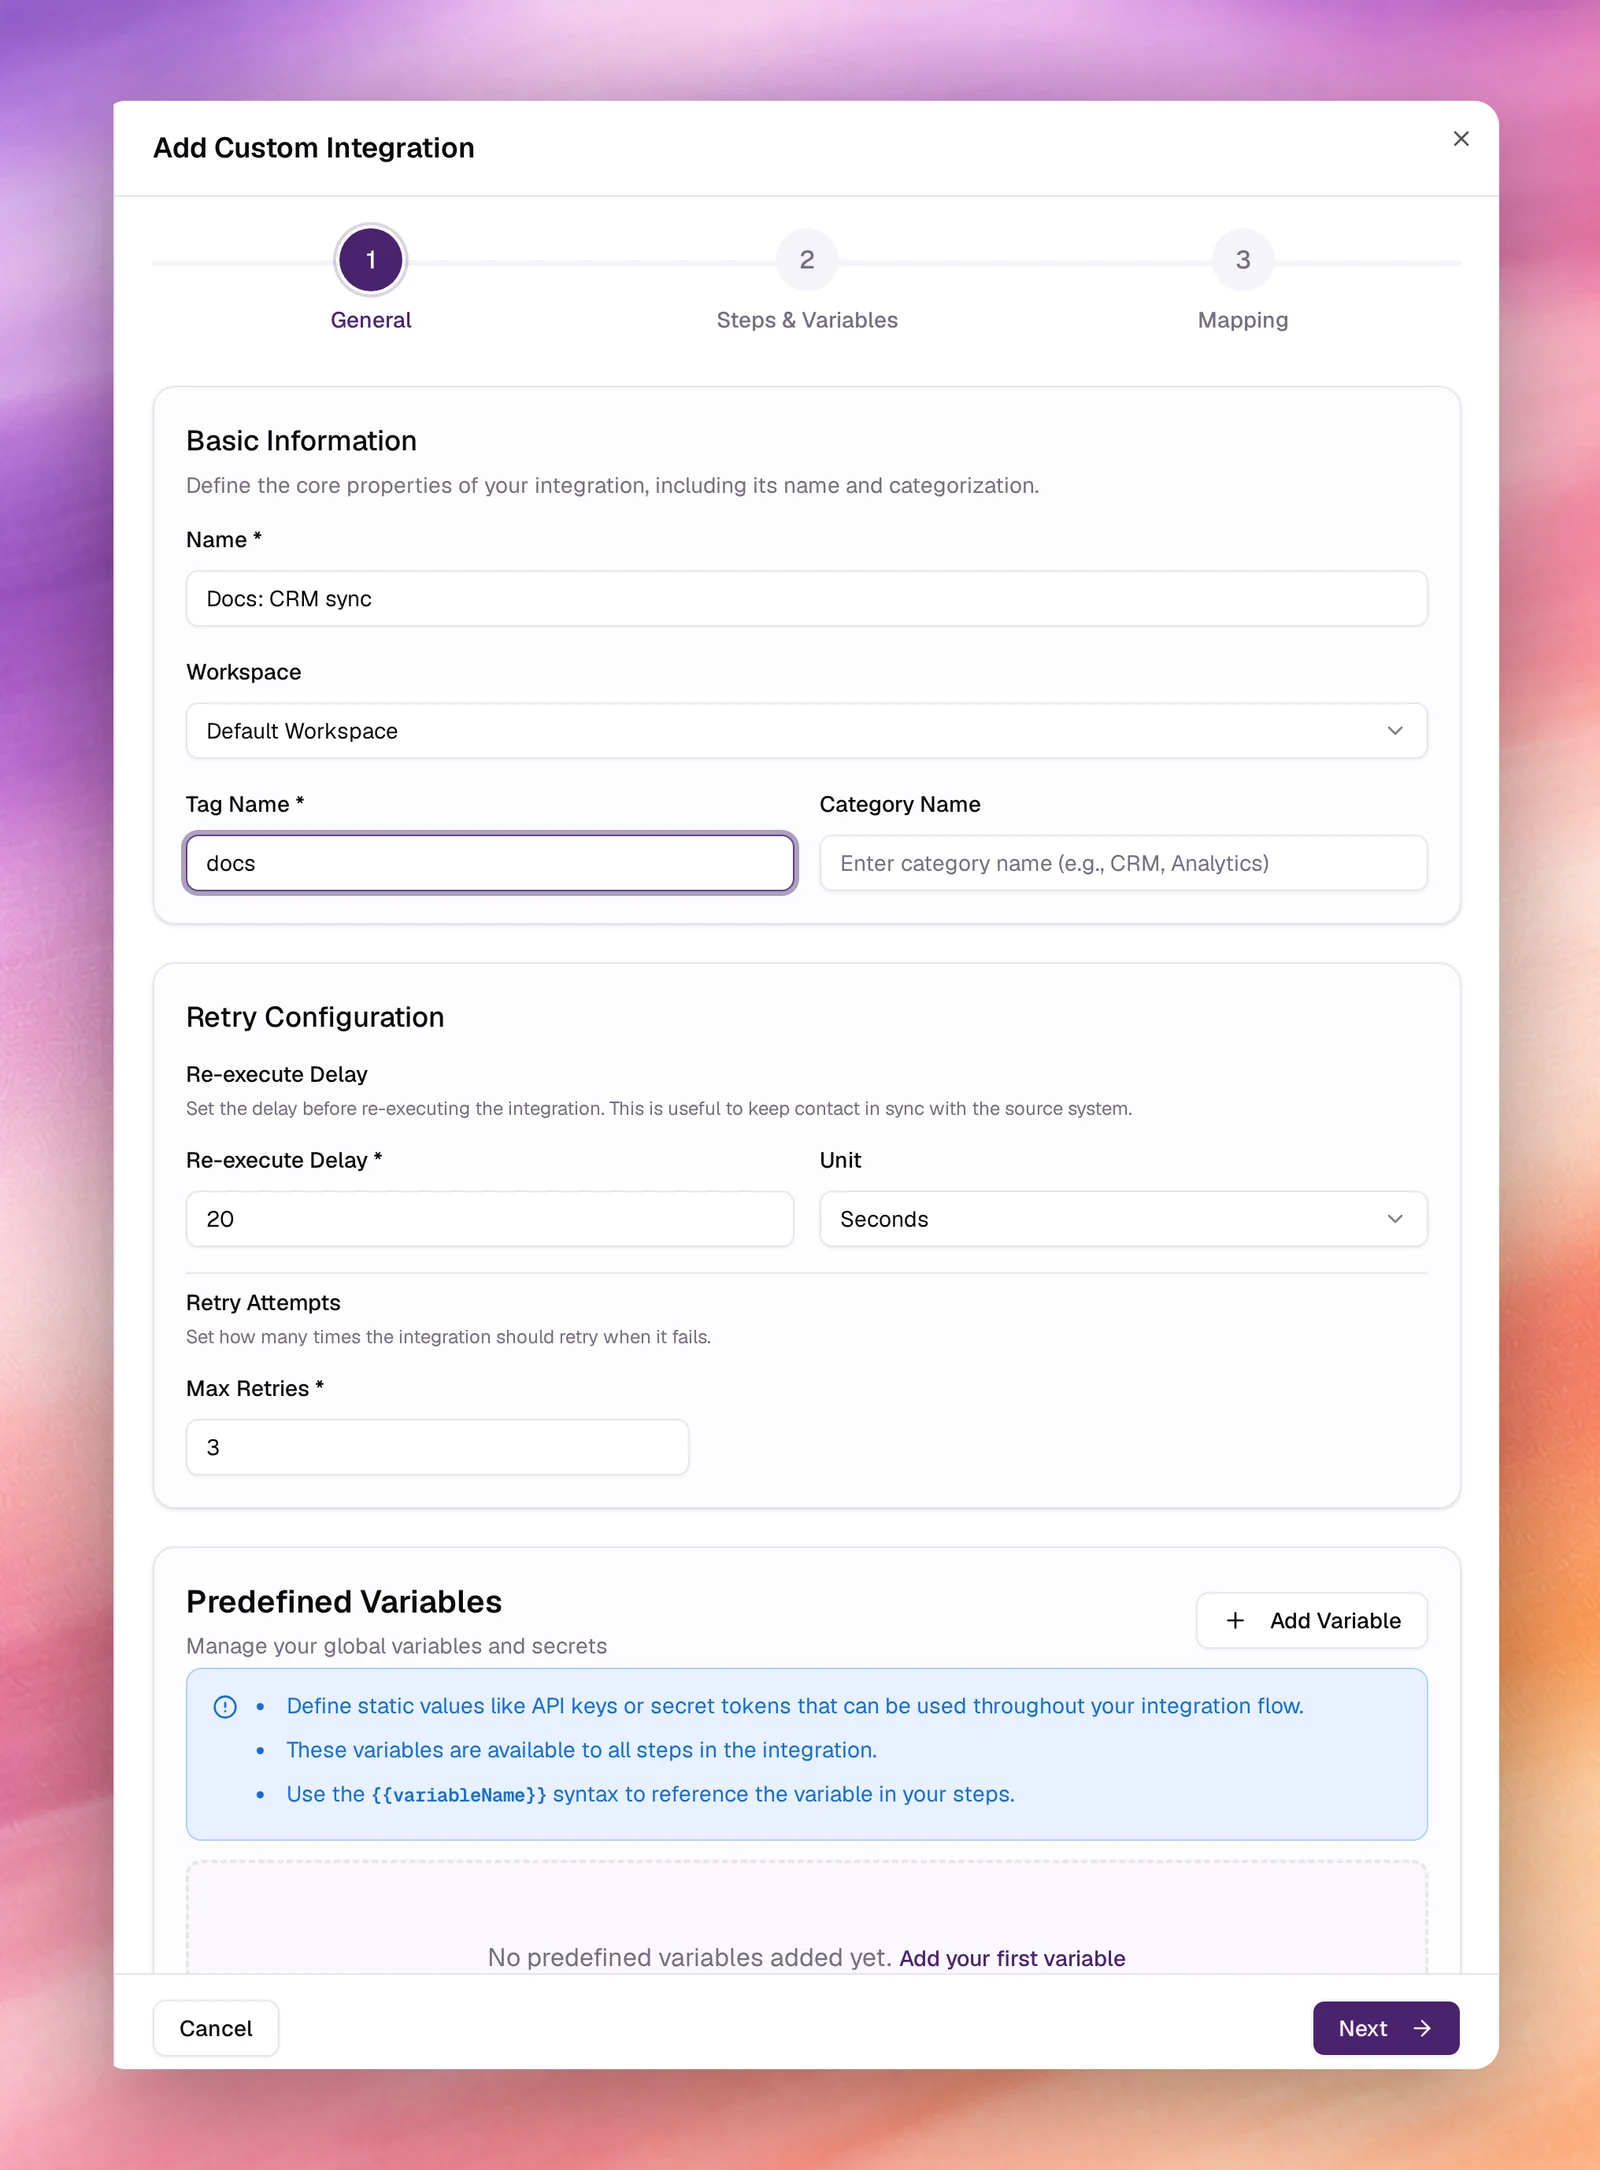
Start from Scratch opens Add Custom Integration, a wizard in 3 steps: General, Steps & Variables and Mapping.
Step 1: General
Basic Information
| Field | Meaning |
|---|---|
| Name (required) | How the flow is listed, for example HubSpot Contact Sync. |
| Workspace | The workspace whose contacts the flow feeds. Defaults to the current one. |
| Tag Name (required) | The tag given to every contact the flow brings in, for example crm. Campaigns pick their audience by tag, see Audience, tags and categories. |
| Category Name | The category given to those contacts, for example CRM. |
Retry Configuration
| Field | Default | Meaning |
|---|---|---|
| Re-execute Delay and Unit | 20 Seconds | How long to wait before running the flow again, to keep contacts in sync with the source system. |
| Max Retries | 3 | How many times a failed run is retried. |
Predefined Variables are static values, such as API keys or secret tokens,
available to every step of the flow. Add Variable adds a name and a value; refer
to it in a step as {{variableName}}.
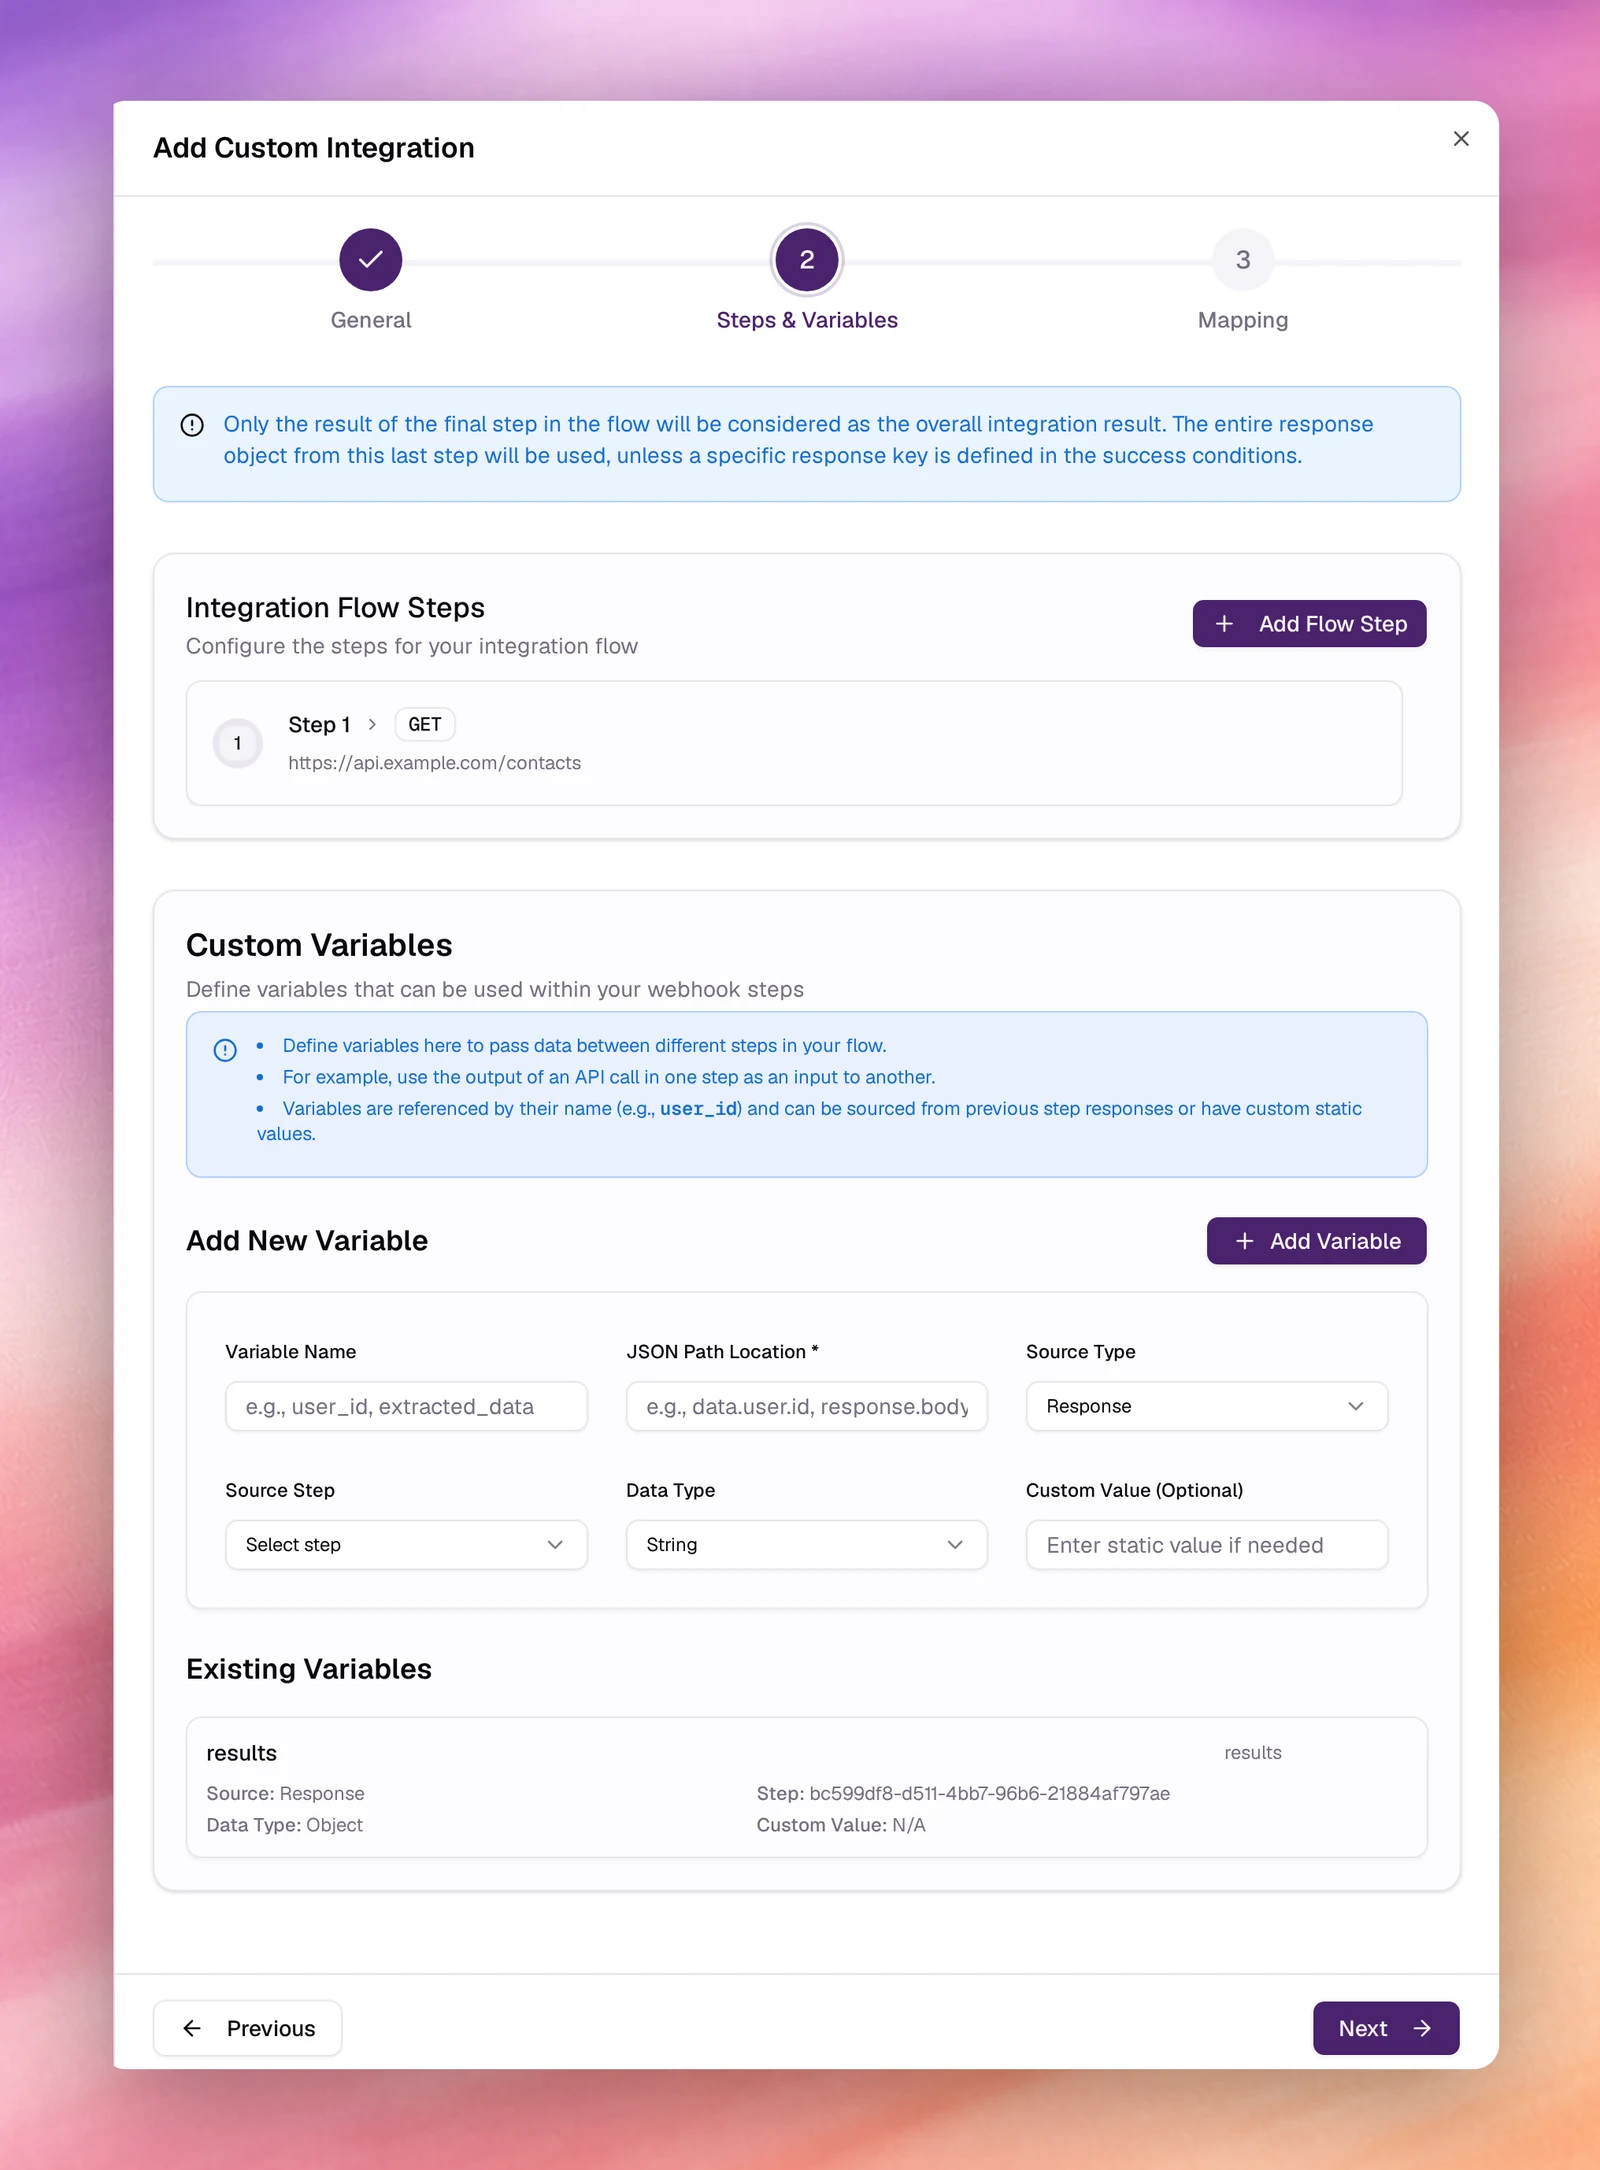
Step 2: Steps & Variables
A banner explains the rule that shapes this step: only the result of the final step counts as the integration’s result. The whole response of that last step is used, unless its success condition names a response key.
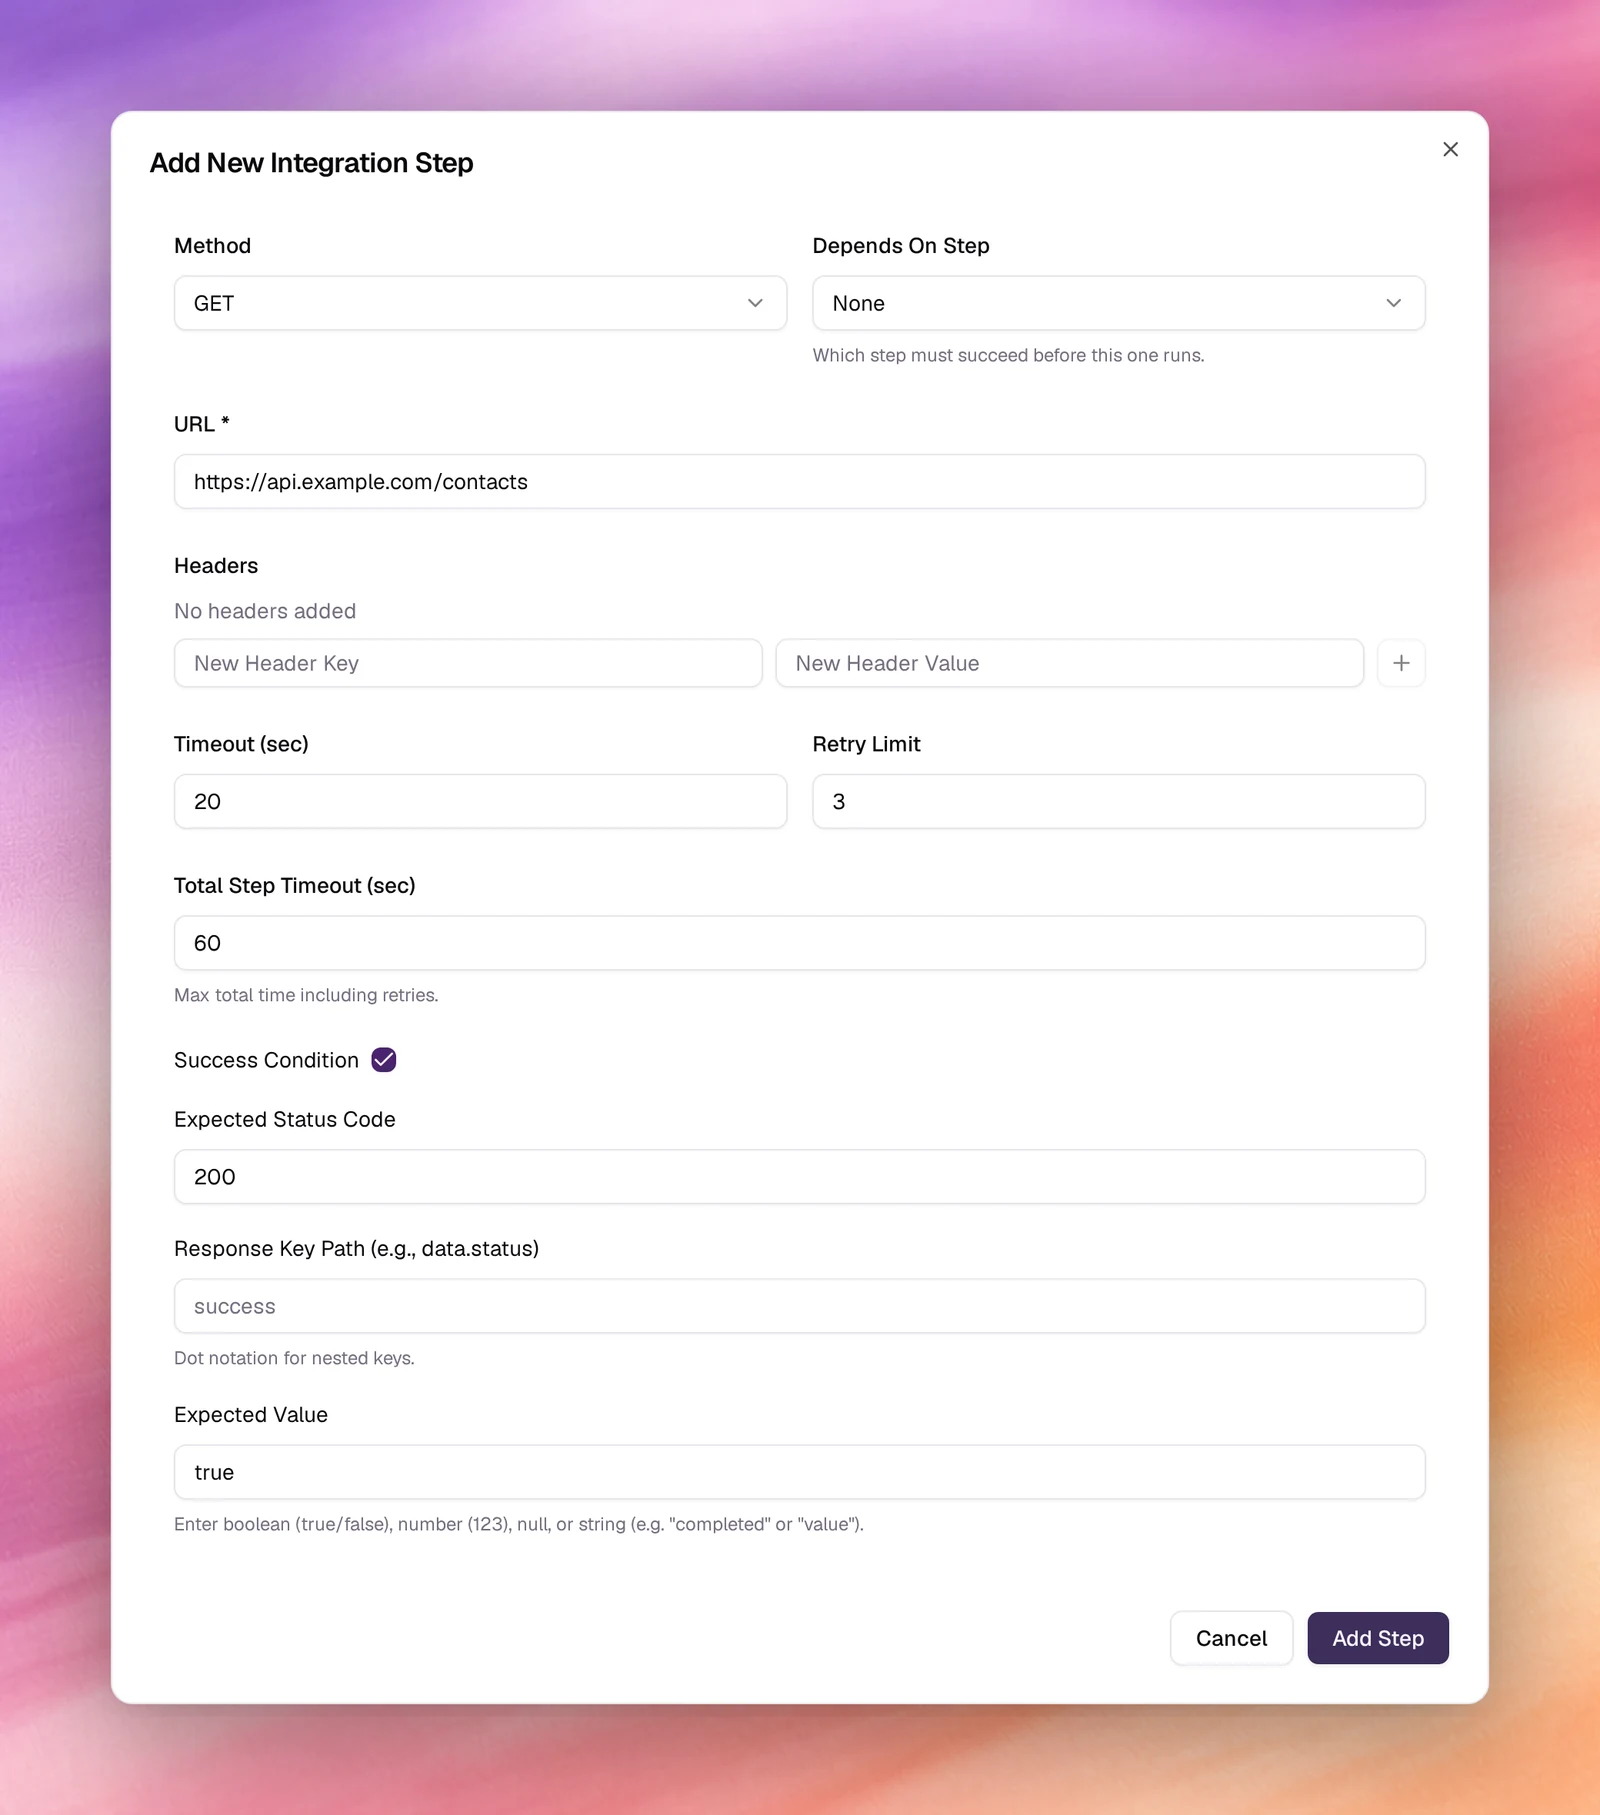
Integration Flow Steps: Add Flow Step opens Add New Integration Step.
| Field | Default | Meaning |
|---|---|---|
| Method | GET | GET, POST, PUT, DELETE, OPTIONS, HEAD or PATCH. |
| Depends On Step | None | Which step must succeed before this one runs. |
| URL (required) | The endpoint, for example https://api.example.com/webhook. Variables are allowed: {{access_token}}. |
|
| Headers | none | Key and value pairs; Add after each one. |
| Content Type and body | JSON | For POST, PUT, PATCH, OPTIONS and DELETE only. JSON, URL Encoded, Form Data or Text; the body is built as JSON fields, key and value pairs or plain text to match. |
| Timeout (sec) | 20 | Per attempt. |
| Retry Limit | 3 | Attempts after the first failure. |
| Total Step Timeout (sec) | 60 | Ceiling for all attempts together. |
| Success Condition | off | When ticked: Expected Status Code (200), Response Key Path in dot notation (data.status) and Expected Value (a boolean, a number, null or a string). |
Each step you add is listed with its method and URL and has Edit Step and Remove Step controls.
Custom Variables pass data between steps: the output of one call becomes the
input of the next. A variable has a Variable Name, a JSON Path Location into
the source (data.user.id), a Source Type (Response), a Source Step, a
Data Type (String, Object, MD5, Array, Number or Boolean)
and an optional Custom Value for a static value.
One variable is mandatory: results, which captures the main output of the flow. A
banner offers Add “results” Variable, which creates it as an Object sourced
from the last step’s response. You cannot move to step 3 without it.
Step 3: Mapping
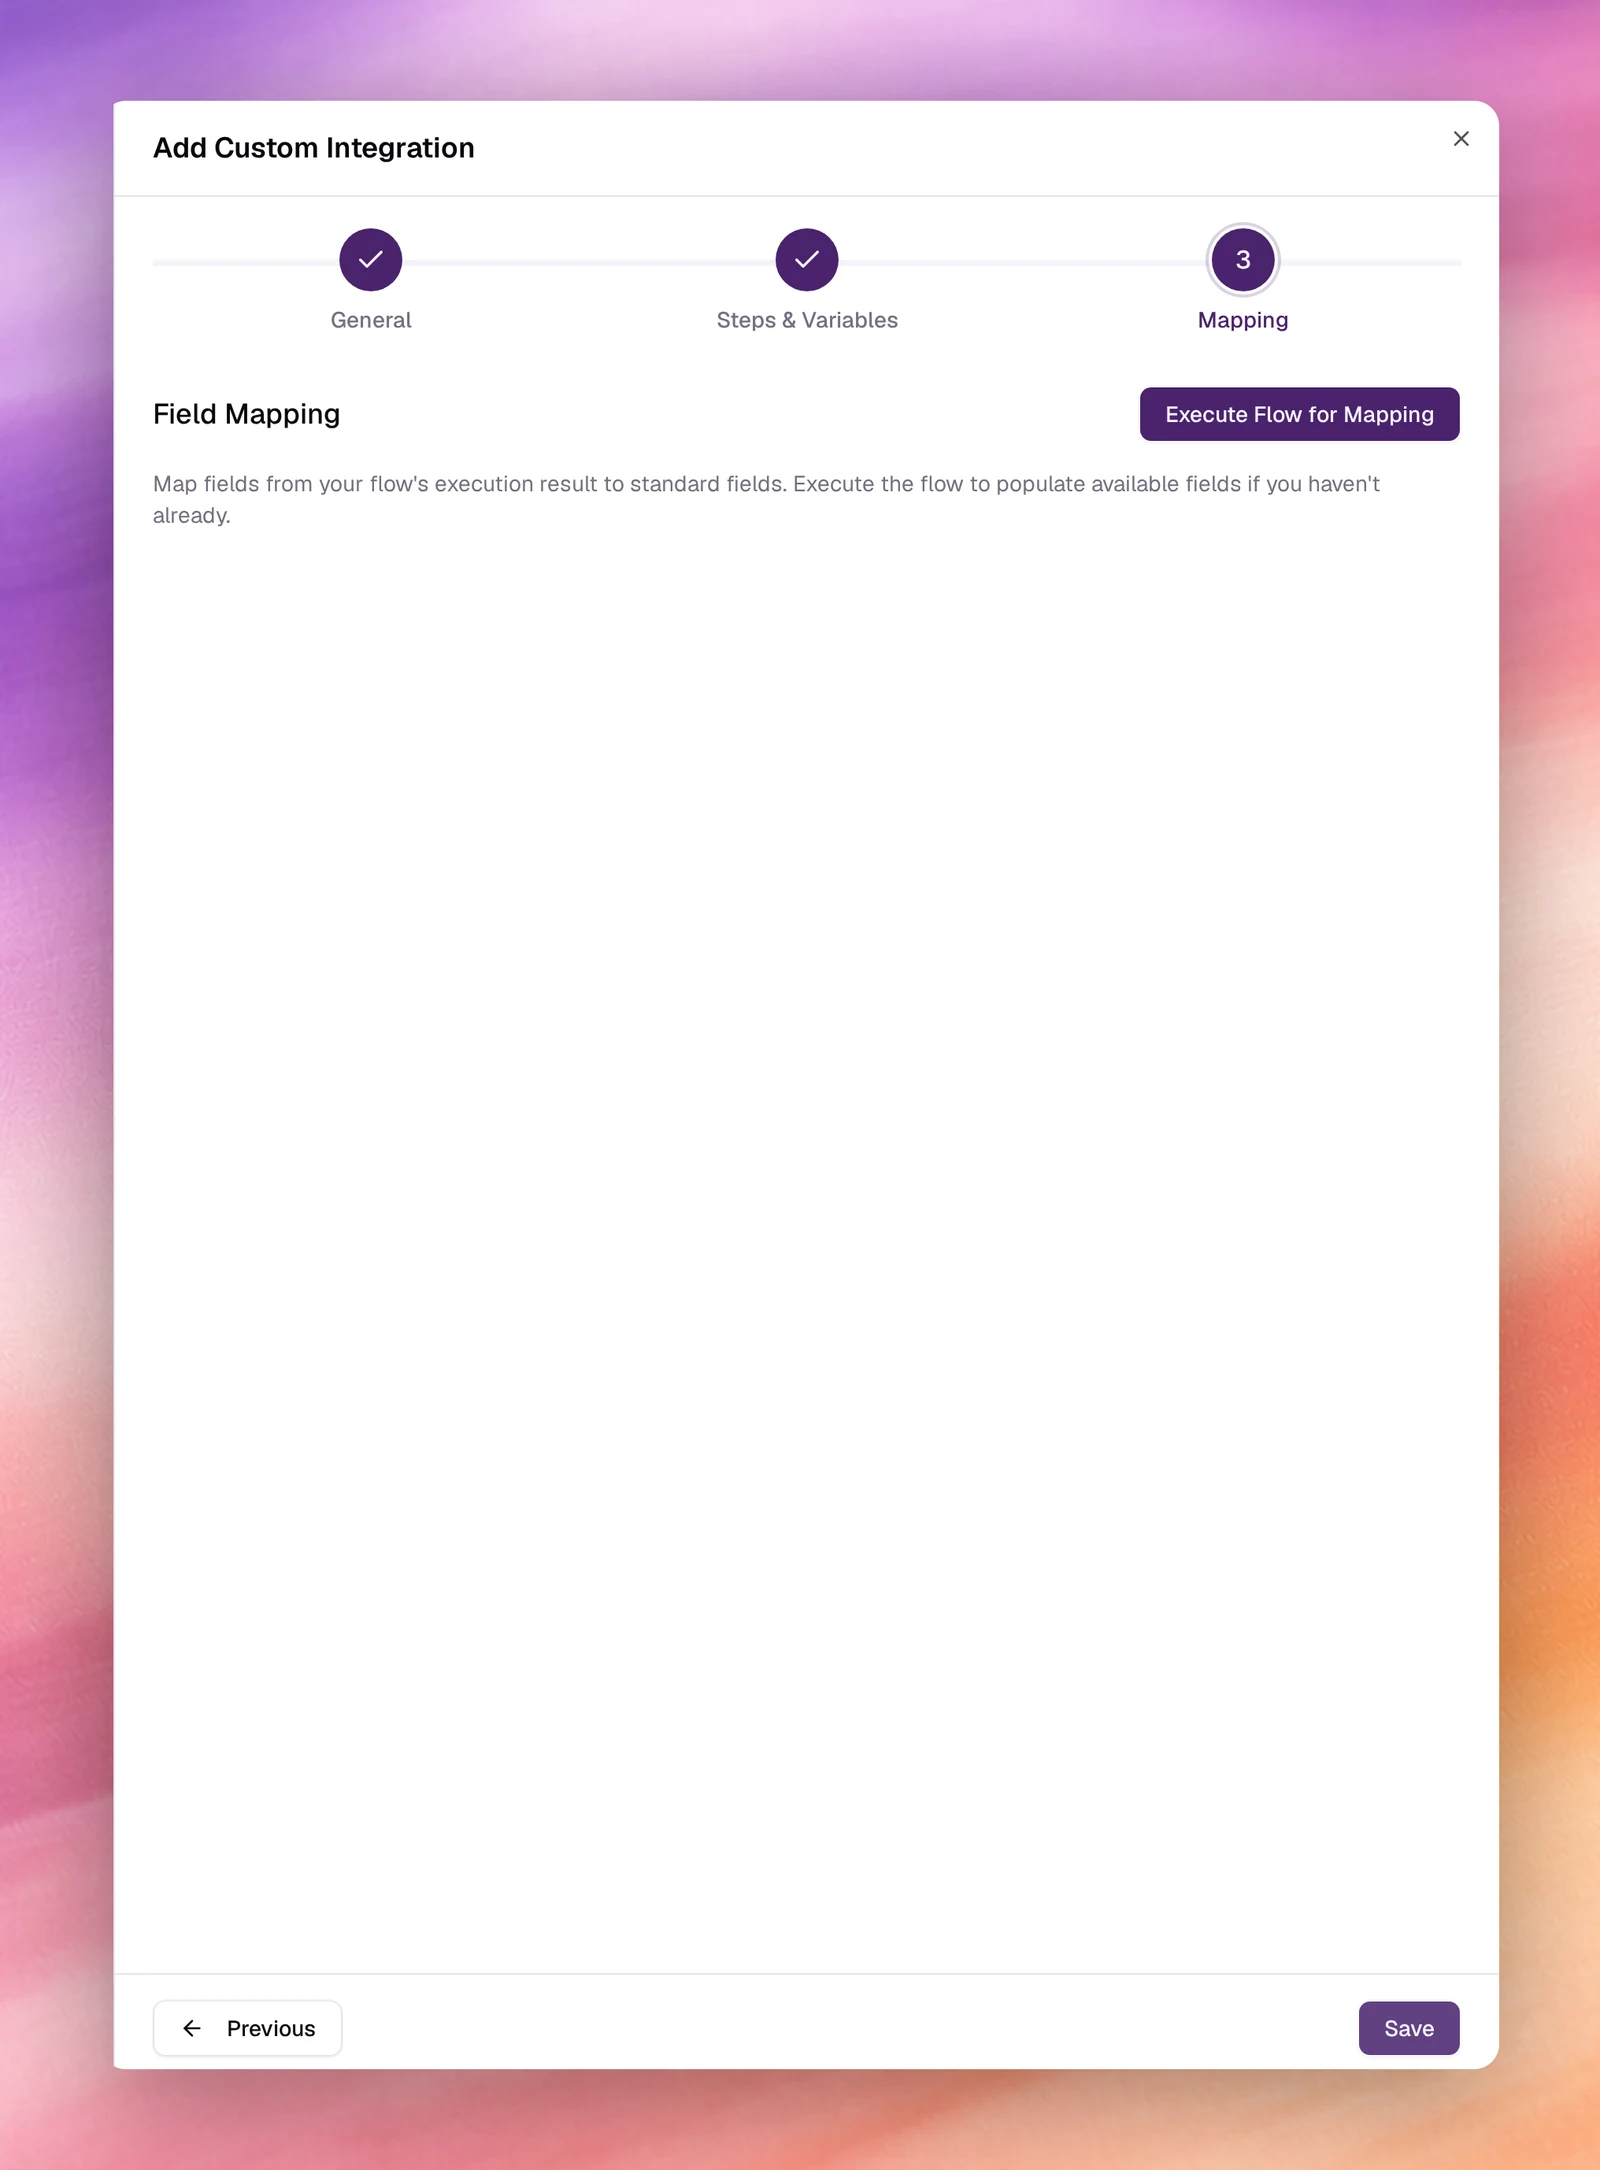
Field Mapping turns the records in results into contacts. Execute Flow for
Mapping runs the flow once so the fields in its result are known, then you map each
one to a standard contact field (name, phone number, metadata). Save creates the
automation.
After saving
The flow is listed under Automations, with the columns Flow, Direction, Status and Actions. The All, Inbound and Outbound buttons and the search box narrow the list.
- Start sets the flow’s status to Running; Stop takes its place while it runs.
- Execute runs the flow once, now.
- The actions menu holds Edit, Duplicate, View History, Test Flow and Delete. Edit opens a single-page form; Advanced Form switches back to the three steps.
View History opens Integration History Logs with the result of each execution; a flow that has never run reads No execution history found for this integration.
Verify
- The flow is in the Automations list and its counter went up by 1.
- After the first run, Contacts lists new contacts carrying the Tag Name you set in step 1.
Troubleshooting
- Next is disabled on step 2. The
resultsvariable is missing. Use Add “results” Variable. - The step fails with a 401. The token in
{{access_token}}is empty or expired. Reconnect the system under Connections, or update the predefined variable. - Execute Flow for Mapping returns nothing to map. The last step’s success condition names a Response Key Path that is not in the response. Clear it and run again.